DESIGN MEETS FUNCTION
What is a printed glass backsplash?
A backsplash covers the section of wall most exposed to splashes and everyday marks. Printing on glass gives this useful surface a decorative role as well, with artwork selected to complement the room rather than a standard tile pattern.
From a restrained colour field to a detailed photograph, the design can change the character of a kitchen or bathroom without redesigning every fixture. The glass construction, printed surface and fixing method should be specified together.
WHY PRINTED GLASS?
Three benefits in one surface.
The original page highlights wall protection, visual impact and simpler day-to-day cleaning. The right specification determines how these benefits perform in use.
Cover the wall
A suitably installed glass panel creates a barrier between the wall and the splashes associated with cooking or washing. The edges and joints also need appropriate detailing.
Shape the interior
Custom imagery brings another layer to the cabinetry, surfaces and lighting. A single printed panel can become a focal point or blend into a subtle palette.
Simplify cleaning
The exposed glass face is generally straightforward to wipe down. Follow the approved cleaning guidance to protect the glass, any coating and the finished print.
APPLICATION / KITCHEN
Refresh the kitchen without changing everything.
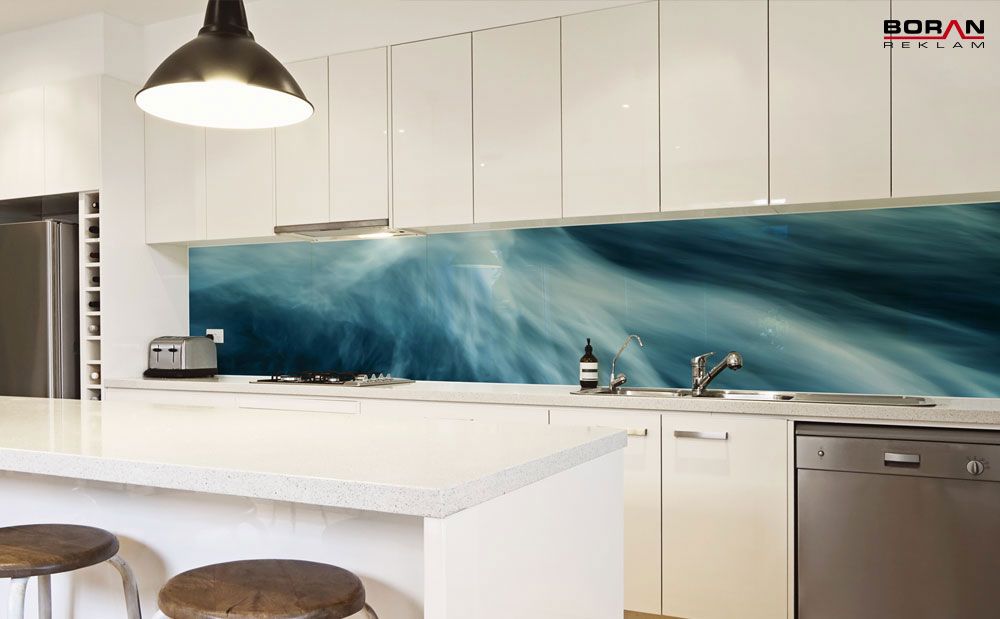
A kitchen backsplash can pick up a colour from the cabinetry, contrast with a quiet worktop or introduce a completely new visual theme. Custom artwork makes it possible to coordinate the image with the room’s dimensions and finish.
Near a hob, the glass type, clearances, heat exposure and installation method need to be checked by the glazing specialist. Accurate measurements and the positions of sockets and other cut-outs should be confirmed before production.
APPLICATION / BATHROOM
Bring a personal visual to the bathroom.
Behind a basin or in another suitably specified area, a printed panel can add a calm pattern, a landscape image or a bold colour accent. The print can be designed to work with the room’s tiles, fixtures and lighting.
The printed graphic itself does not automatically create a non-reflective finish. If reduced glare or a softer appearance is important, discuss the glass finish and lighting during specification. Wet-area sealing and care instructions should also be agreed in advance.
MAKE IT YOURS
Choose a design that belongs in the room.
The original article describes a wide range of visuals. These are useful directions for a project brief.
Colour and texture
Draw from the tones and materials already in the kitchen or bathroom for a coordinated look.
Patterns and images
Use an abstract motif, nature-inspired image or personal artwork sized to the actual glass panel.
One continuous view
Plan the composition around corners, cabinets, sockets and joints so the final graphic reads as intended.
PROJECT CHECKLIST
What should be confirmed before printing?
Dimensions and layout. Confirm the finished size, number of panels, edges, corners and cut-outs with the person responsible for glazing.
Glass and print orientation. Decide the appropriate glass construction and whether the image is viewed through the glass or from the printed side.
Exposure and cleaning. Share details of heat, moisture, direct sunlight and expected cleaning methods so the print and protection can be specified.
Artwork and budget. Provide the image file, desired finish, quantity and timeline. Pricing depends on those choices and the glass specification.